A reminder for those working in Auto, to HOLD DOWN THE POP-UP FLASH on your fancy DSLR so the flash doesn’t go off, the camera will automatically adjust the settings to work without the flash, but if you don’t do this it will be very lazy and use the flash which almost always makes for a flat picture. For point-and-shoot camera’s turn the flash auto mode to OFF. Some may even have a no-flash-but-still-auto setting but I don’t know your camera. Holding it down works on most DSLR cameras.
Natural Light Outside
If you are taking photos outside, the absolute worst time to take pictures is mid-day. Instead you should be taking photos just after sunrise or 1-2 hours before sun-set. Overcast days do make it easier to photograph mid-day but you can’t always count on that.
If it is not sunset or sunrise you can find a large shady area, and avoid dappled light. Specks of full sun that get through tree branches etc. One of these little beams hitting a child on the face or smack on that sweater pattern is going to be very distracting.
If the subject is squinting then chances are the light is too bright. The number one reason we ask for a re-shoot at Petite Purls is because photos were taking in direct sun-light, or the child was dressed in something that clashed or was not seasonally appropriate.
Direct sunlight isn’t bad or a no-no, but in the beginning it’s beat to avoid it.
Natural Light Inside
Inside is the opposite, you want to take photos during the brightest part of the day 1-3pm seems to be the hottest and brightest here. Find rooms with lots of natural light coming in through windows, and as with the photos in Part 2, face your subject towards the light, I often wedge myself into the corner of the window near the wall so I can get a nice shot. I’ve had to really train myself to do this. Asking the subject to look at something out the window will help them face towards it, you will just have to use your creativity and find what works when speaking to your subject to get them to do things you want. It just takes practice and some people are easier then others. I have had a great many perfect moments come from a child getting into a particular pose all on their own, they tend to be more creative then grown-ups!

This photo was shot on AUTO! I freaked out when I got this shot, I loved it. My oldest took this pose all on her own, I was trying to have her  sit to the left of this shot on a bed, but she insisted on sitting on the babies rocking chair. The chair was in a corner and slightly facing the window which is very large and long so while it s behind the left toes in the shot it went along the entire wall and lit her legs. It was a great shot, and it was taken on auto with my holding the flash down (I was inside so the camera wanted to be lazy and use the flash).
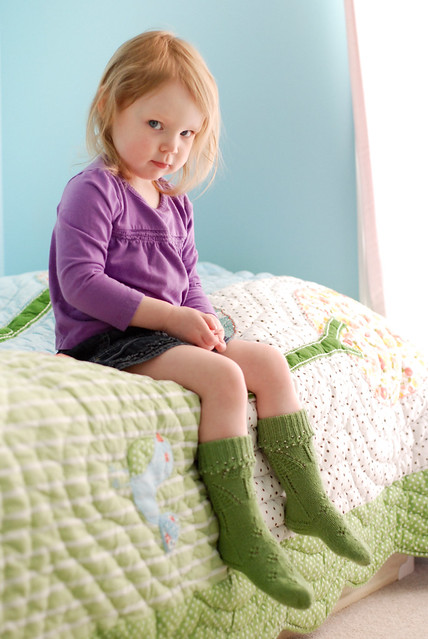
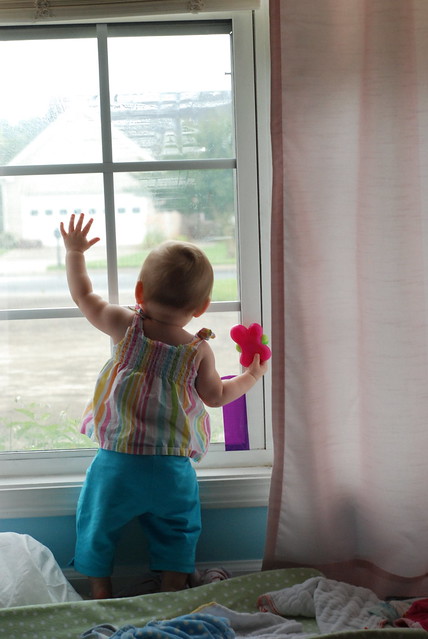
The shot above is what I was trying to get (and got, yay!) due to it being a nice bright day, and the pink slightly sheer curtains acting as a diffuser. Light colored curtains work wonderful for that, and this one is even lined. It was also shot in Auto. If my camera was moved ANY MORE to the right, there would have been so much brightness and white in the photo from the window that it would have automatically exposed DARKER and it would not have been as nice, but because MOST of the photo had the medium colors in it, it did a good job. Notice how the over-all color palette sets a mood for this photo, YOU are in control of that!
If it’s mid-day the sun should be high in the sky and not coming directly through the window to create harsh shadows, sunset light through windows can sometimes cause that if you are in the direct path of the sun. In both of my daughters rooms I have semi-sheer curtains and I really like the light that is created by them, but I need super bright days for the photos to look good.
Color and Light
Be careful if you place the model next to things like a bright red wall. The light can reflect back on them and make everything stained a bit red, or orange, or pink or whatever color it might be. I also find that reds are sometimes hard to photograph if they are very bright, and it’s good to have some white in the photo and even black to help balance out the colors. Even better a medium gray does the job. Other colors in the background, foreground and clothing can have a huge effect on the photo when your camera is in Auto Mode and even just for mood from an artistic perspective. If you want a more vintage feel place them in areas with lots of muted colors and rustic looking backdrops. For bright pops of color, bright green grassy fields or wild flowers and gardens with bright flowers can create a nice look. Â Think about the color in your garment and the color in the surrounding area and how light will effect it, try taking photos at different times of the day and seeing what you like. Don’t just have one photo session, have two or three trying indoor light, out door light, or a pretty shaded veranda at a neighbors house that is nicely landscaped.
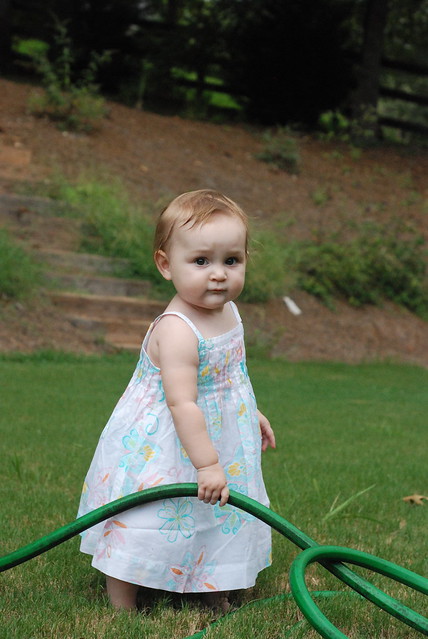
Take a look at this photo below, notice the steps behind her. Now look at her face. Really great light hitting her face. I took this around 6 in the evening when the sun has begun to set, so it almost looks overcast outside. At sunset there is no direct light hitting anything for the most part, here the sun must be behind the house or the tree’s but the sun is actually facing her, or rather she is facing the sun, even if it is half hidden. Not the worlds best background, if I had gotten a lot closet to her there would have just been a blur of trees instead and it would have looked better, and her face would have been a bit more bright, and even asking her to look at something over my left shoulder like snapping my fingers etc would have put her face a bit more into the light.
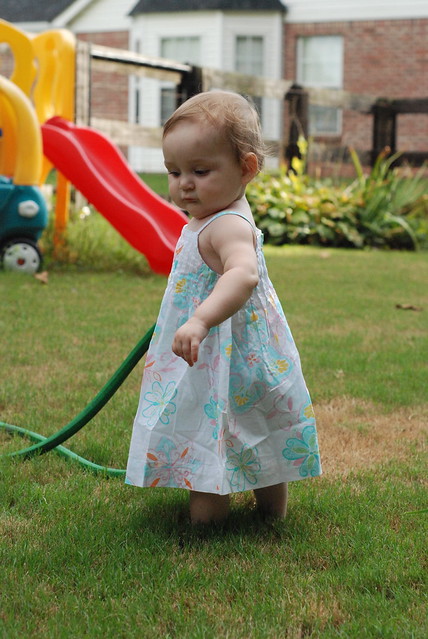
Now look at this one below, i took it just a few seconds later, but remember those steps? The steps are to my back now, and the sun is to her back. Look at her face, it’s in shadows. Just going outside on an over cast day or at sunset isn’t enough, you need to be facing the sun even if you can’t see the sun. The light is still there, it just has a big filter over it. Very much like a very large window directly facing the sun, with a nice semi-sheer curtain to filter the light. If the subjects back is to the window, the light will be bad. If you have them face the window and you wedge yourself facing them to the side of the window, you will get a lovely shot.
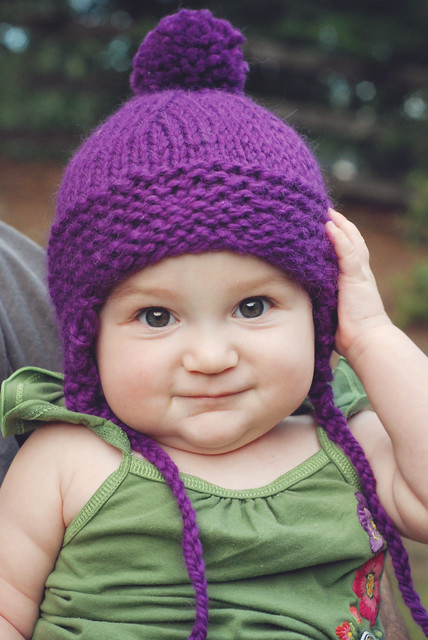
This photo of her in the hat was taken at around the same time in the evening, on a different night. She is even in the same spot, but this time she is facing a bit more left, and I am much closer to her. It’s nearly perfect minus my husbands shoulder, and her wearing a summer dress with a hat. I was just snapping the photo to show a recent FO, and didn’t expect to get such a good photo when I was being so blase about it. As with any art, photography can have lots of happy accidents.
This photo below is a great example of my being on the wrong side of the model, tho in this instance I still like the photo as a parent, but it would never work for a knitting pattern photo if she was wearing something hand knit.
Onward to:
Photography for Knitters – Overview
Photography for Knitters – Using Natural Light
Photography for Knitters – Photographing Yarn
[…] to: Photography for Knitters – Camera Modes Photography for Knitters – Using Natural Light Photography for Knitters – Photographing […]
[…] Photography for Knitters – Overview Photography for Knitters – Using Natural Light Photography for Knitters – Photographing […]
[…] to: Photography for Knitters – Overview Photography for Knitters – Camera Modes Photography for Knitters – Natural light Photography for Knitters – Photographing […]
What a blessing your tutorial is! I’m starting a website and need to take better pics of my objects for the site, patterns, tutorials. I googled “Photography for knitting” on a whim, never really thinking I’d FIND something! Was thrilled to find your site!
FYI – a tip for backgrounds! Recently(7/25/2012)my local craft store (Joann’s) had stretched paint canvases on 50% off! I found there were 2 packs that included a free gallery canvas (frame is thicker) so I scarffed up the 11×14 and 16×20 sizes. I figured I could hinge the two together to make a stand-up background, and use the gallery size as the base. I can paint the canvas as needed to show off yarn and garments.
So thrilled to find your site, and ideas on how to paint my backgrounds!
They are still on sale in case anyone else wants to go this route!
http://www.joann.com/canvas-value-pack-11×14/xprd991996/
Thanks for the information, that sounds neat. Did you ever wind up taking any shots with them?
[…] to: Photography for Knitters – Camera Modes Photography for Knitters – Using Natural Light Photography for Knitters – Photographing […]